
Event Videography: How to Film an Event Step-By-Step Guide
Capturing an event on video requires more than just pressing record. Whether you're documenting a corporate conference, music festival, or product launch, knowing how to film an event properly can mean the difference between forgettable footage and content that drives real engagement.
Professional event videography involves careful planning, the right equipment choices, and an understanding of how to capture authentic moments as they unfold. Get it right, and you'll have compelling content for social media, promotional campaigns, and lasting archives. Get it wrong, and you're left with shaky clips that miss the energy entirely.
This guide walks you through the essential steps of filming an event, from pre-production scouting to capturing those critical moments on the day. And while professional filming forms your content foundation, platforms like SureShot help event organizers supplement their footage with authentic attendee-generated videos, giving you multiple perspectives without the added production costs.
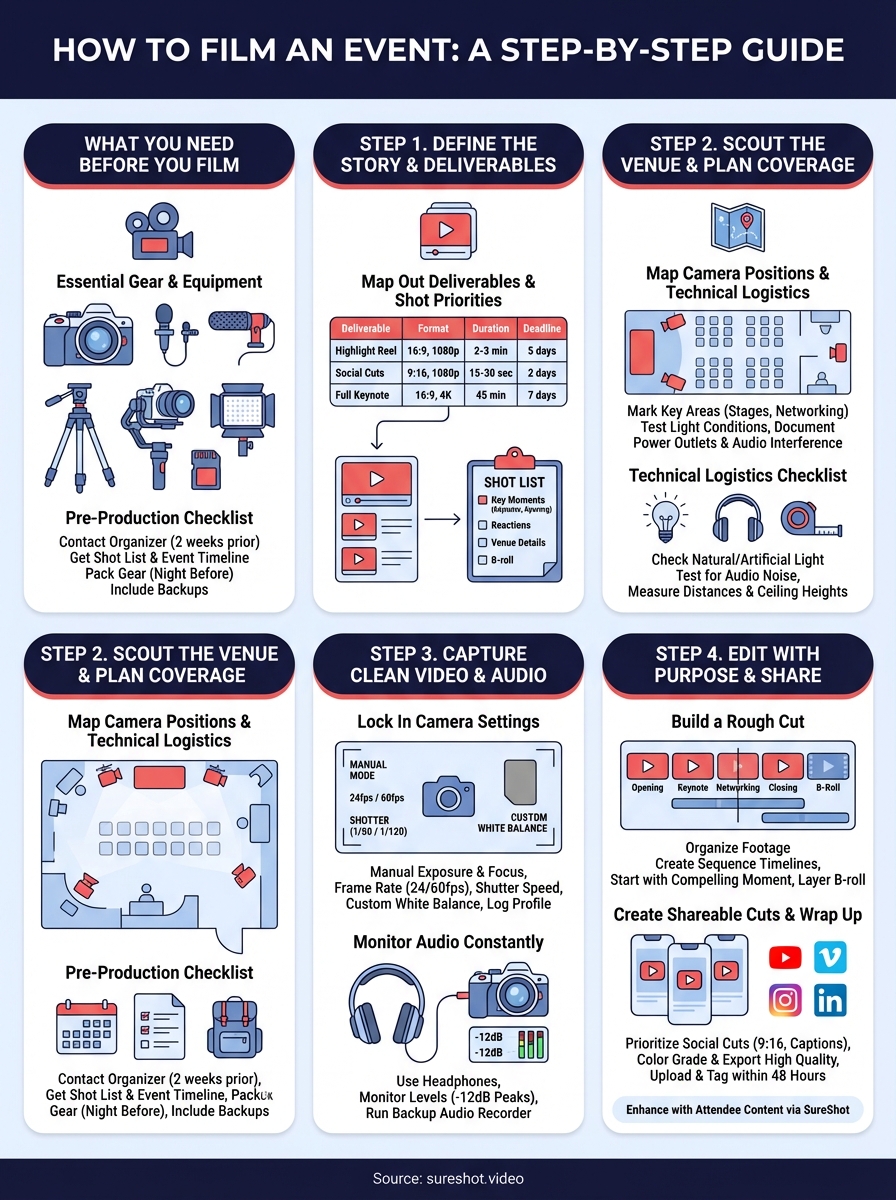
What you need before you film
Understanding how to film an event starts long before the actual day arrives. You need the right equipment in place, a solid understanding of your deliverables, and clear communication with event stakeholders. Missing any of these preparation elements can derail your production before you even arrive at the venue.
Essential gear and equipment
Your camera setup forms the backbone of your production. You need at least one reliable camera body with manual exposure controls, allowing you to adapt to changing lighting conditions throughout the event. Mirrorless cameras or DSLRs work well because they handle low light better than basic camcorders and give you flexibility with lens choices.

Audio equipment matters just as much as your camera. Invest in a wireless lavalier microphone for capturing presenter audio and a shotgun microphone mounted on your camera for ambient sound. Poor audio ruins otherwise good footage, and fixing it in post-production rarely delivers professional results.
Your support gear keeps everything stable and mobile. Pack a fluid head tripod for static shots, a gimbal or stabilizer for smooth movement, and extra batteries for every device. Memory cards should have fast write speeds (UHS-II or better) to handle 4K recording without dropped frames.
Professional event coverage requires redundancy in every critical area, from batteries to memory cards to backup cameras.
Lighting gear depends on your venue access. If you can set up before the event, bring LED panel lights with adjustable colour temperature. For run-and-gun situations, a compact on-camera LED light helps fill faces during interviews or dark areas.
Pre-production checklist
Contact the event organizer at least two weeks before the event date. You need their shot list priorities, access permissions for restricted areas, and the event timeline with key moments marked. This prevents you from missing critical speeches or performances because nobody communicated the schedule.
Create a detailed equipment checklist and pack everything the night before. Include charging cables, lens cleaning supplies, gaffer tape, and a portable hard drive for immediate backup. Walking into an event and realizing you forgot essential gear wastes valuable filming time.
Step 1. Define the story and deliverables
Every successful event video starts with a clear narrative framework and specific deliverable expectations. You need to understand what story the event organizer wants to tell and what formats they need before you plan your coverage. Asking "what's the purpose of this footage?" shapes every decision you make on filming day.
Meet with stakeholders to identify whether they need a promotional highlight reel, full presentation recordings, social media clips, or all three. Each deliverable requires different filming approaches. A highlight reel demands capturing emotional reactions and wide establishing shots, while presentation recordings focus on speaker clarity and slide visibility.
Map out your deliverables and shot priorities
Document exactly what you're producing and when each piece needs delivery. Create a simple deliverables table that outlines format, duration, and deadline for each video asset:
| Deliverable | Format | Duration | Deadline |
|---|---|---|---|
| Highlight reel | 16:9, 1080p | 2-3 min | 5 days post-event |
| Social cuts | 9:16, 1080p | 15-30 sec | 2 days post-event |
| Full keynote | 16:9, 4K | 45 min | 7 days post-event |
Build your shot list based on these deliverables. List specific moments you cannot miss, like opening ceremonies, keynote speakers, award presentations, and attendee reactions. Include backup shots that add context, such as venue details, crowd atmosphere, and sponsor branding. This preparation transforms how to film an event from guesswork into structured execution.
Your shot list acts as your filming blueprint, preventing you from missing critical moments while giving you creative flexibility.
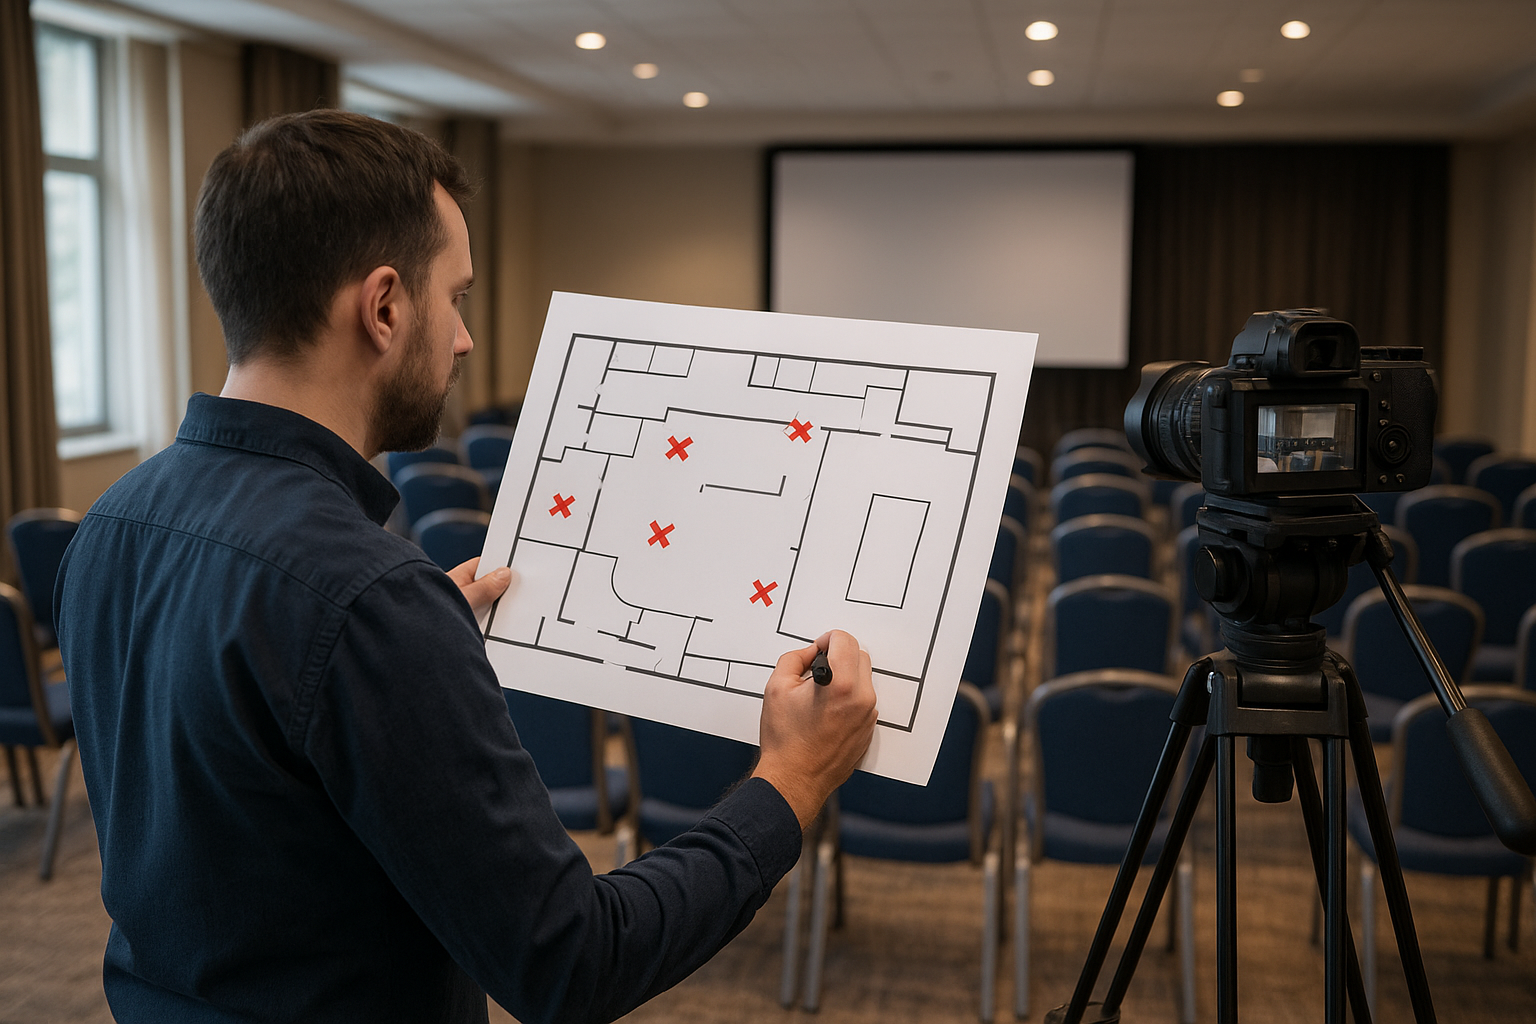
Step 2. Scout the venue and plan coverage
Visiting your venue before the event gives you control over variables that would otherwise catch you unprepared. Schedule a walkthrough at least one week ahead to identify lighting challenges, power outlet locations, and optimal camera positions. Understanding how to film an event becomes exponentially easier when you know exactly where problems exist before they happen.
Map camera positions and technical logistics
Start by identifying where key moments will occur on the event timeline. Mark speaker stages, performance areas, registration desks, and networking zones on a simple venue map. Test each location for natural light conditions at the actual event time, noting whether windows create harsh backlighting or if artificial lighting dominates.
Document power outlet locations and measure distances to your planned shooting positions. Extension cords often fall short when you're racing against setup time, and wireless transmitters need charging stations nearby. Photograph each area from your intended camera angles so you can reference them when planning specific shots.
Check for audio interference sources like air conditioning units, kitchen areas, or nearby construction. These background noises ruin dialogue in post-production, so note which positions avoid them. Measure ceiling heights if you plan overhead rigging, and confirm load-bearing capacity with venue management before hanging anything.
Venue scouting eliminates guesswork and lets you walk into filming day with strategic positioning already solved.
Create a position priority list ranking locations by their importance to your shot list. This ensures you claim the best spots early when multiple videographers compete for space.
Step 3. Capture clean video and audio on the day
Filming day separates prepared videographers from those who struggle. You need to arrive at least 90 minutes before the event starts to set up equipment, test audio levels, and confirm your camera positions work as planned. Knowing how to film an event means executing your preparation flawlessly while staying flexible when unexpected changes occur.
Lock in camera settings before recording starts
Set your camera to manual mode for both exposure and focus. Auto settings create inconsistent footage when lighting shifts or people move through your frame. Configure your frame rate to 24fps for cinematic feel or 60fps if you plan slow-motion sequences. Keep your shutter speed at double your frame rate (1/50 for 24fps, 1/120 for 60fps) to maintain natural motion blur.
White balance requires attention in mixed lighting environments. Set a custom white balance using a gray card under the venue's dominant light source rather than relying on auto white balance. This prevents colour shifts between clips shot in different areas. Record in log profile if your camera supports it, giving you maximum flexibility in colour grading later.
Manual camera settings prevent inconsistent footage that becomes obvious during editing when clips don't match.
Monitor audio constantly with backup systems
Plug closed-back headphones into your camera or recorder and listen actively throughout the event. Audio issues happen silently, and you won't know your wireless mic cut out unless you monitor continuously. Set recording levels so peaks hit around negative 12dB, leaving headroom for unexpected loud moments without distortion.
Always run a backup audio recorder clipped to the speaker or placed near the stage. When wireless systems fail, your backup saves the production.
Step 4. Edit with purpose and create shareable cuts
Your raw footage transforms into valuable content through strategic editing decisions and intentional story structure. Knowing how to film an event extends into post-production, where you shape hours of footage into compelling narratives that match your deliverables. Start by organising clips into folders labelled by timeline segments (opening, keynotes, networking, closing) to speed up your editing workflow.
Build a rough cut following your shot list
Import all footage into your editing software and create sequence timelines for each deliverable type. Your highlight reel follows a different structure than full presentation recordings. Begin with your most compelling moment rather than chronological order, capturing attention in the first five seconds. Layer B-roll over any talking head sequences longer than 10 seconds to maintain visual interest.
Export your social media cuts first because they require immediate turnaround. Create vertical 9:16 versions for Instagram Stories and Reels by reframing your 16:9 footage on the most important subject. Add burned-in captions since 85% of social video plays without sound. Keep these clips between 15 and 30 seconds, ending with a clear call to action.
Strategic editing turns raw footage into content assets that serve specific distribution channels and audience behaviors.
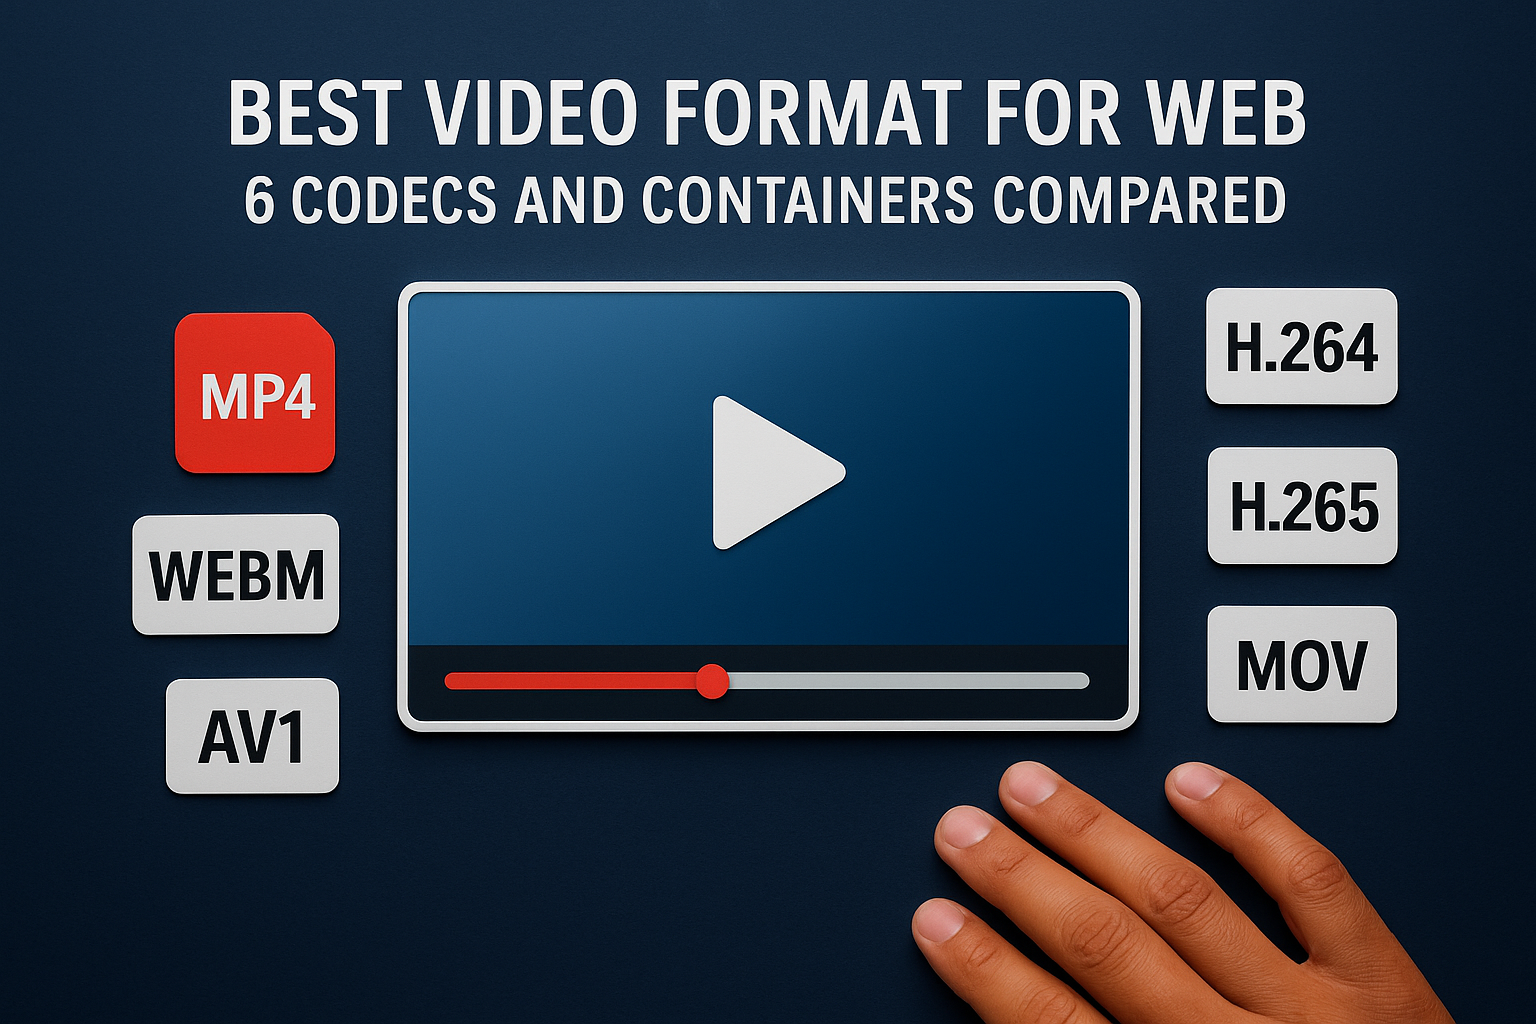
Colour grade your footage to match your brand guidelines or create consistent looks across all clips. Apply subtle corrections rather than extreme filters that distract from your content. Export in the highest quality your platform supports, typically H.264 codec at appropriate bitrates for each destination.
Wrap it up and get it in front of people
Learning how to film an event professionally gives you content assets that only work when they reach your audience. Upload your finished videos to YouTube, Vimeo, or directly to social platforms within 48 hours while the event remains fresh in attendees' minds. Tag relevant speakers, sponsors, and attendees to maximise organic reach and encourage sharing across their networks.
Professional filming provides your content foundation, but modern event success comes from capturing multiple perspectives simultaneously. Platforms like SureShot let you collect authentic video moments from attendees themselves, giving you dozens of unique angles and genuine reactions without additional production costs. This attendee-generated content amplifies your professional footage and creates deeper engagement with your community.
Ready to see how attendee video collection works alongside your professional filming? Book a quick demo to explore how SureShot helps event organizers capture and leverage content from every attendee's perspective.